Autumn Crock-Pot Air Freshener

Autumn Crock Pot Air Freshener

What scents remind you of Fall and Autumn?

To me, it’s warm scents of cinnamon, apple butter and baking bread. It’s the smell of the autumn air with crunching leaves beneath my feet. It’s the smell of the harvest.

These scents always makes me feel like Autumn is officially here! Isn’t it amazing what just a scent of something can bring up in our memories? I remember that this was the season my mom used to start her baking and the kitchen would be filled with all these wonderful scents and more.

If you are like me, you like your home to smell warm and inviting. One easy way to do this is by using natural things to bring the scents of the season right in and make your family and anyone who happens to drop by feel cozy and content.

I save just about anything that I can in this small living space and one thing I save is citrus peels. If you stick them in the freezer, you can easily pull some out for flavoring baked goods, cleaning or in this case, making an air freshener!

This scented air freshener will really make your home smell awesome, and the best part is, it is 100% natural. Unlike candles, scented wax or spray air fresheners, this autumn scented air freshener is safe for pets, kids and anyone with sensitivities to perfumes.

Autumn Crock-Pot Air Freshener

Autumn Crock-Pot Air Freshener
 
Ingredients
  • Orange peels, about 2-3 oranges worth
  • 1-2 apples
  • 2-3 Cinnamon sticks
  • 6 Cups of Water
  • 15 Whole Cloves
  • 3 Whole Star Anise
Instructions
  1. Place all of the ingredients in a pot and simmer on medium.
  2. Place in a heated crock-pot and set to warm to allow the scent to stick around.
  3. You can store it in your fridge for 2-3 days if you want to reheat it again.

Food Safety Basics for Home Cooks

Food Safety Basics for Home Cooks

I am sure most of you know that I have a passion for food. Something else that is a passion of mine might seen kind of strange, but the two are very related. One could almost say I am obsessed with this other subject; cooking in a clean kitchen. What most people call the “stomach flu” is usually due to eating food that is not properly prepared and then the germs get spread.

When preparing food for yourself and others to eat, it is VITAL that you use some precautions. Cleanliness in the kitchen is not just about wiping things down and doing the dishes. With just a few simple changes, you can make your kitchen a “clean cookin’ machine”!

Food Safety Basics for Home Cooks

First lets start with the basic. It may seem obvious to you, but hand washing is essential when cooking both before, during and after.

Here are some other tips for cooking safely in the kitchen

  • Never “re-use” a cutting board for a different task without washing first, in hot soapy water. Many people just flip over the cutting board and use the same board for chopping both veggies and cutting up meat. This is a huge no-no! This is called cross contamination and is the #1 way food is made unsafe for consumption. I have actually have two different colored boards for these jobs. One is for meats only and the other is for veggies etc. Make sure to disinfect the counter after cutting up something on a board to prevent juices from other foods getting into your RTE (ready-to-eat) foods.
  • Keep meat on the bottom of your fridge and always place it on a plate to prevent spillover of juices and blood.
  • NEVER eat food that requires refrigeration if it has sat out at room temp more than 3-4 hours and always cool down food before placing in your fridge (more on that in another article). If you put hot food in your fridge, it can alter the temp in the fridge and cause spoilage of other foods.
  • NEVER let food thaw on the counter. Sure people have done it and not gotten sick, but why risk it? If food that requires cooking or refrigeration sits out more than 4 hours, it can grow enough bacteria to make you sick even IF you cook it after.
  • When re-heating, always reheat to 165 degrees F internally. Get in the habit of checking foods when you reheat them. If re-heating in a microwave, stop halfway and stir the item to break up any cold spots and distribute the heat evenly an continue microwaving.
  • Make sure you cook meat to proper internal temps. Many people don’t know what the proper temps for foods are so I have included it here for some common foods. It isn’t enough to just visually see that you think it is done. Place a thermometer in the meat and see what temp it stays at for 15 seconds.
  • Don’t just wipe up messes, disinfect them with hot soapy water before moving forward. This goes for your hands, too. If you cut up veggies, wash them thoroughly before moving onto your next task. It only takes 30 seconds!


Proper meat temps:


For Chicken, always cook to 165 Degrees F

For Ground meat like beef, its 160.

For fish, cook to 145

For Pork, cook to 145.

It is essential that you have a food thermometer. You can get an easy to read digital thermometer for a low cost on Amazon. When I say cook to a certain temperature, it is vital that you do so as bacteria can survive if you don’t.

I suggest keeping this chart from the Food Safety website handy.


This post contains affiliate links. Thank you for supporting my blog!


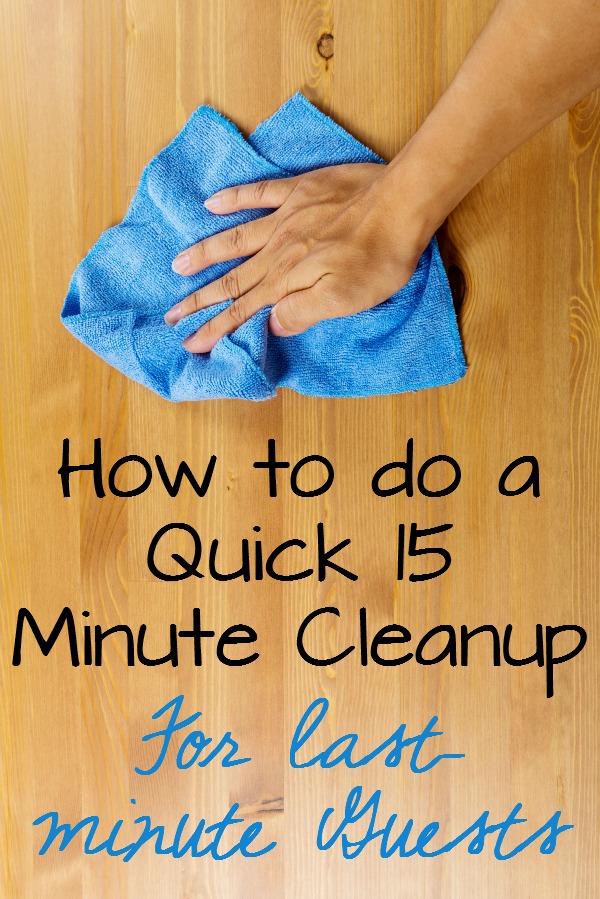
How to Do a Quick 15 Minute Cleanup for Guests

How to do a quick 15 minute cleanup for guests

It happens when you least are ready for it. You get a phone call from someone that they are kind of near you and they would like to come see you and your main living area is a mess. You try to keep your home “guest ready”, but for some reason, that never seems to happen when guests are ready to come over. It’s the one day after your child was sick or you got wrapped up in some project and simply decided you didn’t feel like picking up the mess that evening.

If you have a quick 15 minutes before they arrive, you can do a quick clean-up that you can at least give your home the appearance of being clean without doing a deep clean right there and then so you can focus on the more important things, like spending time with your guest.


How to Do a 15 Minute Cleanup for Guests


First, grab a laundry basket and start tossing anything that doesn’t belong there in it. You can worry about where it goes later. Put the basket in a bedroom.

If you have mail or other papers lying around, grab a folder. Slide them all in it so they don’t get lost.

Do a quick sweep of the kitchen and spot clean. Toss any dirty dishes in the dishwasher or stove to get them out of sight. You don’t have to actually clean them right now, just get them in a place where your guests won’t see them.

Run a rag over the counters where you will be entertaining and dust these areas quickly.

Take the trash out so your home smells fresh. If you have a diffuser for essential oils, you could use this as well, but b aware that some people may have sensitivities to scents.

Since guests seem to always need to use the bathroom, do a quick wipe over the toilet and sink and toss anything out of place in a drawer.

Run the vacuum over the main floor area. Don’t worry about the whole house, you can get to that later.

This usually only takes me about 15 minutes if I rush. Remember that guests usually won’t notice anything you think is super out of place or the fine messy details you know are there. Don’t be too focused on these areas, and instead worry about de-cluttering and quick wipe downs.


Essentials for Outdoor Dads

Essentials for Outdoor Dads

My husband is in love with nature. He would live in a cabin in the woods if we could. I couldn’t because, well, I obviously need my internet access, but if that wasn’t a factor, I would most certainly run away with him and be a hermit.

I grew up in Montana. The woods and mother nature was just a way of life there. I have many fond outdoor memories as a kid and some of those memories are surrounded by certain things, and even products that trigger them.

This father’s day, if you are looking for some perfect gifts to get the men in your life that love the outdoors, consider one of the following items, because let’s face it; anything that can be used over and over for years at a time is about as Eco-friendly as it gets.

Essentials for Outdoor Dads

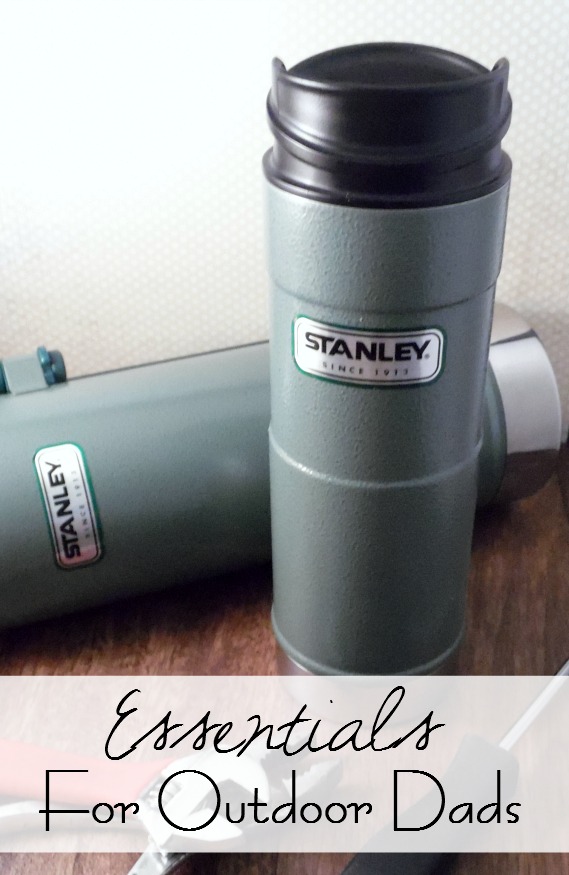
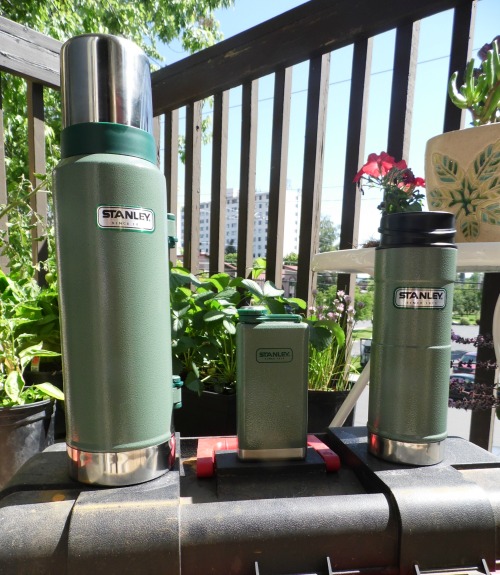
Stanley Brand has been iconic for me when I was growing up. It’s that green bottle that brings back memories of my grandfather going hunting. He would fill it up with coffee and take it with him. My own father used to take one with him on his morning rounds at work, too. Stanley Brand’s iconic green vacuum seal bottle is what I remember the most, but I was pleasantly surprised to see that they make a whole slew of products now. Let’s look at some of them.

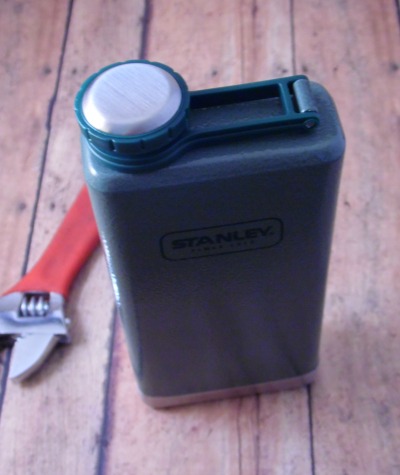
The Adventure Flask. This by far was my husband’s favorite when he saw it. He is not even a big imbiber of the spirits, but he has this thing with containers. I personally think this is perfect for putting some wine in and taking it with you. I love that it is easy to fit in a backpack and take along. And of course, it comes in that iconic hammertone ice green, too.

Stanley flask

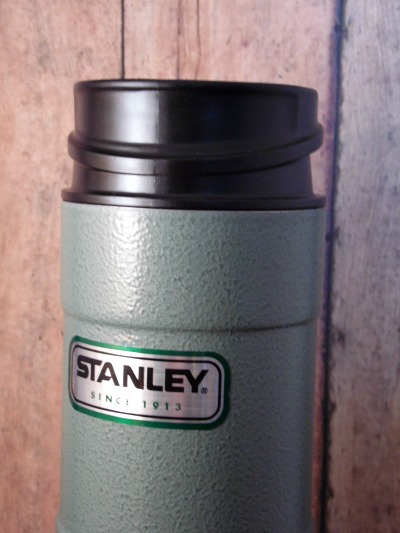
The One-Hand Vacuum Mug. This is like the little brother of the larger mug I remember from my childhood. I didn’t show this one to my husband because I wanted to surprise him with it. He is always complaining that the mugs I get him to put his coffee in are not good because they don’t keep it hot or cold long enough. This mug from Stanley Products keeps the contents hot for 4.5 hours and cold up to 20 hours if iced. This is perfect for him! He could enjoy his iced coffee even after we take a hike several hours later!

Stanley Mugs

The Vacuum Bottle. This is the one I remember from my childhood. It was slung into many a truck by many men in my life and never once lost it’s charm. This one has a handle, though and I love that.

I was pleasantly surprised to also see that Stanley Products feature cool new products I had not seen before such as the eCycle Nesting food containers. Being a bit of a green queen, I was very happy to see how they are starting to make products that are made from recycled materials and since it’s Stanley Products, I trust them to be super durable.

stanley products for dad

Do you have any Stanley Products that bring up memories for you of your dad or another man that was important to you growing up?

How to Find Time to Cook (When You Don’t Have Time)

How to Find Time to Cook

More and more people are eating out these days. Not only is it because we are so busy, but it is super convenient as well. It can get us in and out of the door in only a few minuets and if you go through a drive-thru, it’s even quicker. The unfortunate problem with eating on the go is of course the loss of nutrition from fast food or take-out and the big one for most people is the cost. We used to eat out a lot, and when I sat down and figured out the cost, I was ashamed of how much we were spending each month. The amount we spent on eating out would have left us eating like kings and queens if we spent that money on groceries at home.

With me, eating out is just too convenient. We live right down the block from a strip on a busy street filled with anything from local joints to every fast food restaurant imaginable and even some chain sit downs. I also suffer from chronic pain and fatigue and honestly, just cooking is sometimes too much for me to handle and so I give in and get something less than ideal. I have learned a few things along the way to prepare me for my bad pain days or the days when we are just too busy. Here are my tips on how to find time to cook, even when you don’t have time.


How to Find Time to Cook (When You Don’t Have Time)


Keep easy meals on hand at all times. Sit down and make a list of meals you can make with minimal ingredients. This can be as simple as pasta with some sauce or soups. One of my favorite cheap and easy meals I can make is my Hamburger Casserole. I almost always have those ingredients on hand.

Make freezer meals. This can be done pretty easily and only requires a little bit of your time. You can find tons of freezer meal recipes by just doing a quick search on Pinterest. I like to make soup in big batches and store some in my freezer. Its a quick meal I can pull out and make a sandwich with.

Meal plan. Planning meals takes a little bit of time, but if you do it on a weekly basis, it should only take you about 1/2 hour each week total. To meal plan, I always start with looking in my pantry, fridge and freezer. I make meals based on what we have on hand. I also keep a running list in a notebook of meals that my family loves and try to include 1 or 2 of these each week. If I have some ingredients I am not sure how to use, I do a quick search on Pinterest to find some good recipes to make using those ingredients. For instance, I had some beef broth the other day, so I typed in “Recipes made with beef broth” to see what I could make with other ingredients I had on hand. Doing this save me money because I am not buying duplicates or letting food go to waste. Plus, it saves me time because I already know what I will be making.

Cook in the crock pot. My crock pot is my friend. You can make so many meals in it and it does the cooking for you. This really requires no time. Just do one crock pot meal a week and you save so much time. Freezer meals are perfect for the crock pot as well.

Don’t make things overly complicated. A meal does not have to mean a big main dish with a starch and a veggie side with dessert. A meal can simply consist of soup and a sandwich or a salad with chicken. There are many quick things you can cook that are healthy.

Make some stuff ahead of time. If you start meal planning, you will be able to see what prep work can be done ahead of time. You can shred chicken, cut up some veggies and prepare some sauces a day or two before you need them. This can save time on a busy night.

How do you find time to cook when you don’t have time? I would love any tips you can share in the comments!


Essential Oil Safety Tips

Essential Oil Safety Tips

You have heard me talk about essential oils so many times on my blog. This is because I am very passionate about them and what they have done to change the way I clean, live and take care of myself. However, essential oils can be used wrong and can be even dangerous if used in an incorrect manner. Here are some things to keep in mind when using essential oils.

Essential Oil Safety Tips


Essential oils are highly concentrated. Because of this, you don’t need much to get the job done. And you should also not use them directly on places like your face or even you skin on any part of your body, undiluted. Doing so can cause major skin irritation that can lead to serious skin problems. This is especially something to watch for when you are thinking of using essential oils on infants or young children. Their skin is so, so sensitive and it can have very serious effects on them.

Take only certain essential oils internally and only under the advisement of an experienced herbalist, naturapath or aromatherapist. Because essential oils are so concentrated, they can also cause issues for your liver or be too harsh on your body if you take them too much or too often. This is not to say that you should never do it, but rather that you should seek a professional opinion on the matter before you do so.

Know that some essential oils can make you more sensitive to the sun, even in low sun conditions. Some essential oils like those derived from citrus, especially, can make your skin very sensitive to the sun’s damaging rays. If you use one on your face or another part of your body that won’t be covered by clothing and intend to go outside, make sure to wait at least an hour after applying before doing so to help avoid a nasty burn.

Not all essential oils are created equal. Make sure to check with the company and on reviews to find out about the brand’s purity. An impure oil is more likely to give you adverse effects.

Use extra caution on applying essential oils to red, inflamed or broken skin. You may make it worse. Never apply it directly without a carrier oil such as coconut. Always ask a professional which to use and how often to use it. They can also give you the correct dilutions.

Keep essential oils out of reach of children and pets. Just like with many household things such as medications, cleaners and chemicals, essential oils must be kept away from children and our furry friends.

Check with a professional before using any essential oils if you are pregnant. As with medications and other outside elements pregnant women should avoid, there are some cautions they should also take with essential oils as well.


One last thing; This post is not to replace talking to a professional, naturapath, herbalist, doctor or aromatherapist. This post is for informational purposes only and is not meant to treat, cure or diagnose any ailments or health conditions. Please play it safe and speak with a professional regarding use of essential oils.


How to Cut Your Use of Plastic

How to Cut your use of plastic

It’s no secret that plastic is not good for our environment. Unless you have been living under a rock, you probably know that it uses lots of resources and puts toxic waste into our environment as well as plastic pretty much never breaking down. While it is almost impossible to avoid plastic entirely in our modern world, you can cut your use of it and find ways to reuse the plastic you do come into possession of with some simple changes in how you purchase things you need. Here are some ways to cut your use of plastic.


How to Cut your use of Plastic


Use glass whenever you can. You can buy glass storage containers for storing food and leftovers that will not only be better for the environment, but last for many more years than any piece of plastic. One of the great benefits of using glass for food storage is you can assured that you won’t have harmful chemicals leaching into your food and glass doesn’t stain the same way that plastic does. While it can be more of investment to buy glass storage, in the end you will find many more years of use. I suggest buying a couple of pieces at a time until you have a good amount at home. While it is true that these glass storage containers often have plastic lids, the overall use of glass for storing is much better than plastic.

Buy reusable options for plastic disposables. Did you know you can buy glass drinking straws? It’s true! There are so many re-usable options when it comes to many of our common throw-aways. You can buy aluminum covered drinking containers and even ceramic ones.

Stop your use of plastic when it comes to eating out or buying drinks on the go. Did you know that most fast food restaurants and gas stations will let you fill your own cup for the same price as one you would get in a plastic one? Many times, they even give a discount for bringing your own beverage container.

Use canvas grocery bags. Bring your own instead of using the ones at the store. It really isn’t too hard to do once you get into the swing of it. I recommend canvas because many of the ones on the market today are just heavier plastic and while these are better than using the disposable ones in the long run, if there are other options out there, why not use them? If cost is an issue for you, check out thrift stores for old canvas book bags. They can be purchased for less than a dollar each in most cases.

Buy food in bulk if you can. While you will probably still be using those plastic produce bags to get them home, you will be cutting your use of plastic in the long run that has no purpose such as those that come in packaging. Check with your local bulk foods store and see if they have a program that allows you to bring your own containers as some do allow that as long as they are clean and sanitized.

Don’t bag things that don’t need it. Most of us are so used to bagging our fruits and vegetables in those plastic bags available in the produce aisle we don’t even think about it any more. There really is no need to uise those for most fruits and vegetables as you will be washing them before you eat them anyway.

Buy what you can as locally as you can. Most farmer’s markets are open markets that allow you to just buy foods without packaging. Shop these places as often as you can.

Make some of your own cleaning supplies. One of the biggest wastes of plastic in packaging comes from cleaning supplies. If you make your own, you can store it in re-usable glass containers such as mason jars and not only save yourself money, but cut those packages out entirely. (check out my section on making your own cleaning supplies for some suggestions on how to make some of these.)

Find a way to use all plastic you get at least once again. For example, those produce bags can be used for cleaning up after your dog or cat and something like a pill bottle can be used to store bulk herbs (washed out well, of course)


How do you cut plastic from your life? I would love to hear your suggestions in the comments!

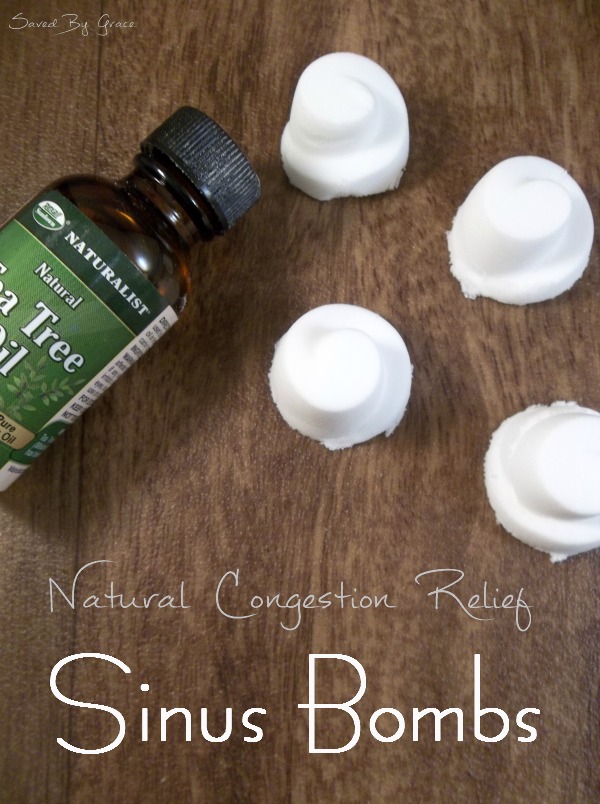
Natural Congestion Relief- Sinus Bombs

Natural Sinus Relief Sinus Bombs

Cold and flu season is in full force now and if you are anything like me, you are sick of pills, pills and more pills to start feeling better. You are looking for a natural kind of relief from your sinus congestion. You are hoping for a sinus infection home remedy that will work well and fast. I heard that tea tree essential oil could possibly clear up sinus issues and I have seen shower bombs made for congestion. My only issue was, sometimes you don’t have time to take a shower several times a day when you are sick to get relief. So, I came up with these mini sinus bombs to use in the sink. I hope you find relief with these as they are super easy to make and use.

*please understand that I am not a physician or professional and as such, I cannot give medical advise. This post is for informational purposes only and is not meant to treat, cure or diagnose any disease or condition. Check with your doctor before use.

Natural Congestion Relief- Sinus Bombs


3.0 from 2 reviews
Natural Congestion Relief- Sinus Bombs
 
Ingredients
  • 1 lb of Baking Soda
  • Spray bottle filled with Water
  • 10 drops of Lavender Essential Oil
  • 20 Drops Tea Tree Essential Oil
Instructions
  1. Pour your Baking soda into a bowl. Spray the baking soda with water, just enough to make it start to stick together.
  2. Mix it up and see how well it forms in your hand. It should feel like damp sand.
  3. If it is not moist enough, spray water again until it easily sticks together but does not feel wet, only damp and moist. Add in your essential oil and mix again.
  4. Place in molds. I used silicon ones because I found that they come out easier. I used candy molds as they are the perfect size for these mini sinus bombs.
  5. Leave in the molds overnight and pop them out. Store in an airtight container that keeps moisture out.
Notes
To use:
Fill your sink with very hot water. Close the door to your bathroom as this is the ideal place to do it.
Pop one bomb into the water and place a towel around your head to create a barrier for the steam. Inhale the steam for relief from sinus congestion.
Do this as often as needed.

9 Reasons to Start Ordering your Groceries Online

9 Reasons to Start Ordering Your Groceries Online

Thank you to Kaisyn Junction for sponsoring today’s post.


As someone who often gets completely winded by even the thought of going to the grocery store because of my chronic pain, I have started to wonder about grocery delivery services. After looking at the options that were available to me last year, I was a bit dismayed. The price to do delivery was too high for my budget and it seemed overly complicated. I was happy to hear about a new business, Kaisyn Junction when they placed a flyer on my door. I was intrigued and was so happy when they offered just what I was looking for. Here are some reasons to order your food online and skip the long lines and grouchy people this holiday season.


9 Reasons to Start Ordering your Groceries Online


Your food will come when you want. Unlike other grocery delivery services, Kaisyn delivers via UPS and they work with UPS’s My Choice program. This means you can order your food and even tell UPS when to deliver it to your doorstep. This cuts out the worry of getting food delivered on a day where the weather is extreme.

Prices are comparable to local grocery store prices. In looking over the website, I noticed that the large markup I was expecting was not there. The prices were about what I expected if I was at the store. In some cases, they were far cheaper. For instance, I got my favorite Durkee’s sauce (a MUST HAVE for the holidays around here) for about a dollar cheaper than I normally get it for.

Shipping is reasonable and free in some cases. Currently, any order over $50 is free to ship anywhere in the US. When you consider the cost of driving around to the stores to get your groceries, this makes it cheaper.

Shipping is fast. I noticed with many grocery delivery services, the wait time to get groceries was up to 2 weeks. With Kaisyn, its usually just 3-5 days. This means you could order your groceries on a Monday and get them by Friday or sooner. Do this once a week and you will never have to go to the store again for the majority of your groceries.

It’s not just junk. You can order meats, vegetables and even organic favorites. You can also order household needs like toilet paper and even cat treats.

You can find specialty foods. I was surprised and happy to see that there was gluten-free foods, organic foods, and even things like diabetic drinks.

You can bundle and save. If you look under “featured groceries”, you will find bundles of groceries at lower prices. Currently, there is some baking and holiday bundles where you can save on all of your holiday baking needs.

You can get all of your household staples. If all you use the service for is to keep all your household staples in stock at home, you will save so much time and money. Many people don’t consider the cost of your time and gas to head to the store a couple of time a week or even month. When I ordered, it took way less time than going to the store.

You could win $5000 in free groceries just for ordering! Right now, anyone who orders over $50 will be entered to win $5,000 in groceries. Wouldn’t that be a great way to welcome the new year?


Are you going to considering ordering your groceries online now? What is one reason you will consider it? Let me know in the comments!


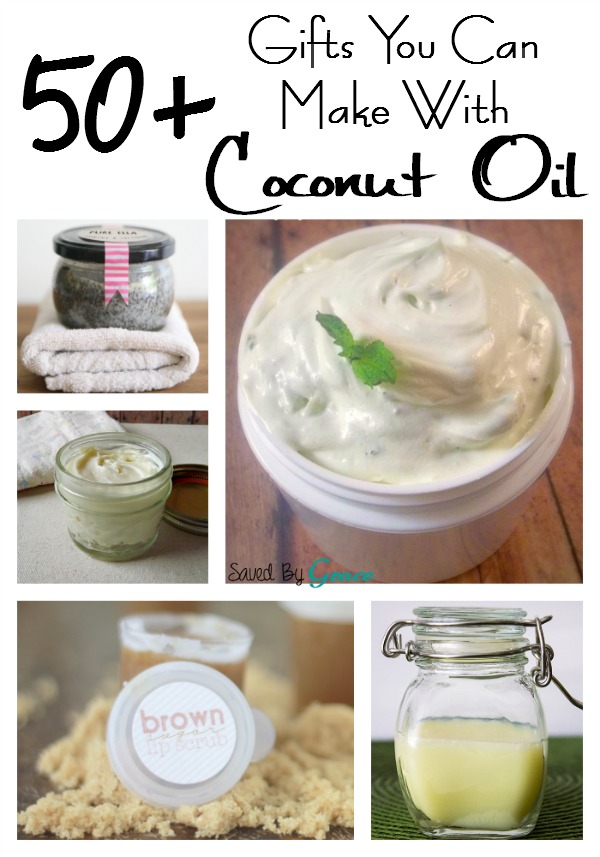
50 + Gifts You Can Make with Coconut Oil

50 Gifts You Can Make With Coconut Oil

Aside from Dr. Bronner’s, Vinegar and baking soda, something I always have in my house is a good old jar of coconut oil. It’s like nature’s remedy for everything! You can eat it, cook with it, use it for dental health, make beauty products with it..the list goes on! Coconut oil is not too expensive and can be bought for fairly cheap if you know the right tips. (see my post on saving money on coconut oil for my own!) I decided that since the holidays are coming up, I needed to compile a list of gifts that you can make with it. Here are Gifts you can make with coconut oil that those on your list are sure to love! Make sure you make some for yourself, too!


50 + Gifts You Can Make with Coconut Oil


DIY Scented Wax Melts by Healthy Living How-To

Coconut Almond Makeup Remover Face Wipes by Saved By Grace

DIY Natural Baby Bottom Balm by Premeditated Leftovers

Coconut Soap by Soap Recipes 101

Brown Sugar Lip Scrub by Crafting E

Natural DIY Sensitive Skin Cleanser by Beauty and the Foodie

Homemade Headache Salve by Confessions of an Overworked Mom

Homemade Eye Cream by Homemade for Elle

Firming and Softening DIY Body Scrub by Pure Ella

DIY Lavender Heel Repair Stick by Saved By Grace

Coconut Oil Honey Hair Mask by Mad in Crafts

Bronzing Body Butter by The Sprouting Seed

DIY Lathering Hand Soap by Mrs January

Breastfeeding Boobie Balm by Complete Recipes

DIY Eyeliner by Delicious and DIY

DIY Blemish Cream by Smart Schoolhouse

Homemade Whipped Coconut Oil Cooling Lotion by Hip 2 Save

Thrifty Moisturizing Bath Soak by Sweetwater Style

Mint & Green Tea Whipped Body Butter by Saved By Grace

DIY Shaving Cream by Popsugar

Natural Homemade Oatmeal Dog Shampoo by Simply Zaspy

Deep Scalp Cleanser by Herbs and Oils Hub

White tea Coconut Oil Bath Bombs by Bakingdom

Oatmeal Honey Face Scrub by Dabbles and Babbles

Snow Cone Sugar Scrub by The Gunny Sack

Citrus Vanilla Sugar Scrub by Saved By Grace

Homemade Eczema Cream by Homemade Mommy

3 Ingredient Calming Lavender Lotion by Primally Inspired

Whipped Grapefruit Mint Sugar Scrub by The Kitchen McCabe

DIY Chai Coconut Lip Balm by Quinnface

Homemade Coconut Lime Foot Scrub by Ma Nouvelle Mode

DIY Natural Lip Balm by Saved by Grace

Sweet Coconut Exfoliating Soap Bars by Essentially Eclectic

DIY Curly Hair Conditioner by One Good Thing by Jillee

Lotion Bars for Pain Relief by Easy-Home-Made

White Chocolate Bath Melts by Bit Square

Whipped Chocolate Body Butter by Coconut Mama

Lavender Coconut Aloe Vera Shave Gel by You Brew My Tea

DIY Coconut Oil Lotion Bars by Veggie Converter

Homemade Baby Shampoo and Body Wash by A Greener Mama

DIY Coconut Sugar Scrub Bars by Kayla Aimee

Choco-Cocoa Mint Sugar Scrub by Saved By Grace

DIY Luxury Solid Perfumes by Inspire Beauty Tips

Lavender and Coconut Oil Sugar Scrub for Gardeners by Mom 4 Real

Homemade and all-natural Face Lotion Bars by Don’t Waste The Crumbs

Tinted Homemade Lip Gloss by Dollar Store Mom

Coconut Oil Cuticle Cream by The Frugal Gals

DIY Leave-In Conditioner by Beauty Tips 4 Her

Homemade Natural Mascara by A Blossoming Life

Baby Rose Sugar Scrub by Smart School House

Coconut Coffee Body Scrub Cubes by Savvy Naturalista

Lavender and Coconut Oil Bath BonBons by Sow & Dipity

I hope you have fun making these coconut oil DIY projects! Make sure to pin this list for later!