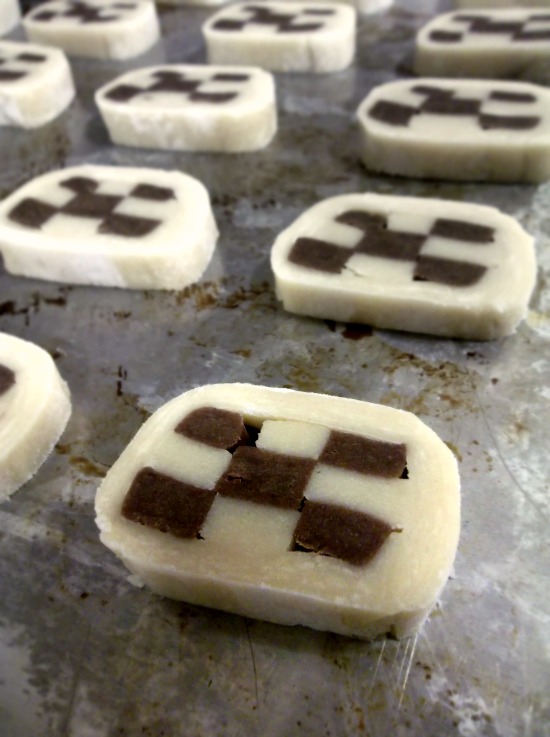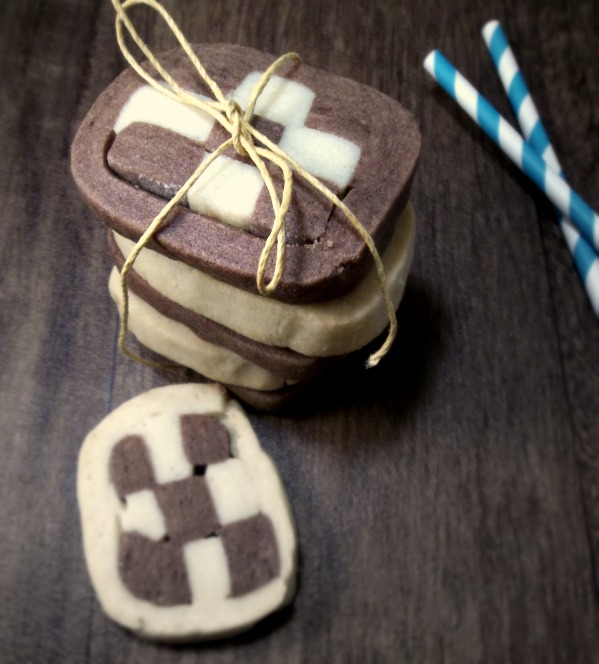
When I was a child, my mom would make pinwheel cookies around the holidays and occasionally, at other special times of the year. These cookies were time consuming, but so beautiful and fun to eat. When I went into culinary school, I failed almost every portion of baking except making these cookies. They turned out beautifully and I fell in love with making them. I only make them around the holidays because they are so labor intensive. They can literally take you 2 days from start to finish because they are what is referred to as “icebox cookies”. That is, they are not a quick dough, but rather the kind that needs to harden in the fridge before you bake them. Since they are created in stages, this means even more hardening and cooling time between steps, however, they are so worth it in the end.

I found a recipe for these on 17 and Baking, but after trying that exact recipe a couple of years ago, I had to tweak it a bit to be more what I was looking for. For instance, I do some extra steps and I add extra vanilla and flour to get them to come out soft as I like them. I also cut them thicker to get that crumbly,soft, buttery goodness I crave. Additionally, I use more cocoa powder and less salt as I found the first batch I made to be slightly too salty and didn’t have a strong enough chocolate flavor. I also use my homemade vanilla extract. Make no mistake, these cookies will be a hit with any party you take them to and are well worth the time you take to make them.

Checkerboard Cookies
- 5½ cups flour
- 1 Tsp Baking Powder
- ½ Tsp Salt
- 4 Sticks of room temperature butter
- 1½ Tbsp Vanilla extract
- 2 large Eggs
- ⅔ Cup Unsweetened Cocoa Powder
- Sift the baking soda, flour and salt together in a bowl.
- In a separate bowl in your mixer, cream the sugar and butter together. Add the eggs, one by one and then the vanilla.
- One cup at a time, add the flour mixture using your dough hook. Sprinkle flour on your surface and remove dough from mixer. Continue to knead together, but don't over-work the dough.
- Divide the dough in half. Place half of it on your surface and fold in the cocoa powder until well-distributed.
- Cut each dough in half and form into two logs of each flavor. Wrap in plastic wrap and place in the fridge for about 2 hours.
- Take out one of each flavor and allow to sit at room temperature for 20 minutes. Roll out on a floured surface into a long rectangle about a foot long and 6 inches wide and ½ inch in thickness. Using a pizza cutter, cut into 9 strips. Do this with the other flavor.
- Layer the strips on top of each other 3 in a row, 3 high; vanilla, chocolate, vanilla and so on. Dampen your fingers and fuse them together with water. Do this the opposite way with the other pieces. You should have two logs. Wrap them in plastic wrap and place in the fridge for a minimum of 2 hours.
- Pull out the other solid logs and sit them at room temperature for 20 minutes. Roll out on a flowered surface about a foot long and ¼ of an inch thick. Place the log with the mostly chocolate pieces on the vanilla dough and wrap it around the checkerboard. Make sure to use a little bit of water to act as a glue and lightly apply it to the inner surface. Seal up any cracks and smooth them out with a small amount of water as well. Use a light hand.
- Do the same with the mostly vanilla log. Place both logs back in the fridge for a minimum of 4 hours (or overnight).
- To bake, take each log out, one at a time, and cut with a sharp knife into ½ inch cookies. Bake on an ungreased cookie sheet for 17-20 minutes on 350 Degrees F until to bottoms are golden brown. Cool on a rack for 10-15 minutes before storing or eating.

I can barely whip up those cookies that you just pull off the roll and bake without destroying them. I am completely in awe of your amazing baking abilities 🙂
haha! The funny part is, I can’t really bake much else right!
Those came out perfect! I was wondering how those were made.
Michelle F. recently posted..Delicious and Important Breakfast Choices on the Atkins 40
They are so time-consuming, but so worth it. Hope you make them yourself sometime, Michelle!
These always look so beautiful. I made some two years ago. It was time consuming but worth it!
Cindy (Vegetarian Mamma) recently posted..Raw Spice Bar – small batch spice blends shipped directly to your door
Those sure are some pretty cool cookies. I love the checkerboard pattern!
OH my goodness, these are so fun! They’re almost too pretty to eat, almost. 🙂
Liz Mays recently posted..Holiday Gingerbread Cake with Splenda #SweetSwaps
Those turned out so pretty and would be great to give as gifts!
Kristin recently posted..Cheeky Hostess Gift Ideas
These are so cute! I love them!
Debra recently posted..DIY TARDIS Key and Door Sign Charms