Sugar Free Peanut Butter Cheesecake Dip

Sugar Free Peanut Butter Cheesecake Dip

The Superbowl is almost here and you are probably on a hunt for low carb game day recipes. While most tailgating snacks tend to be savory or salty, this Sugar Free Peanut Butter Cheesecake Dip is not. It is low carb, but sweet (no too much) just the same, so it’s a welcome change in tastes.. This is a perfect dip for diabetics because it is full of protein as well so if you pair it with fruit, you will get a perfect carb balancing protein.

For peanut butter loving football fans, this is perfect. It is very simple to make, so you can whip some more up in no time if it’s gone by half-time! It uses PB2, a peanut butter powder that has natural sugar in it and hardly any fat. You could also substitute a sugar free natural peanut butter in this recipe, if desired with the same amounts listed.

Sugar Free Peanut Butter Cheesecake Dip

You will need:

  • 1 8oz Package Fat Free Cream Cheese (softened)
  • ¼ Cup Nonfat Greek Yogurt
  • 2 Tablespoons PB2 (prepared)
  • ½ Teaspoon Vanilla Extract
  • Splenda or Stevia to taste if desired

To make:

1. Start by making your PB2 so you have it handy. If you are going with natural peanut butter instead, skip this step.

2. Fold together cream cheese and yogurt until well mixed and smooth.

3. Add your peanut butter or PB2, vanilla and sweetener of choice, if desired.

4. Serve with banana slices, apple slices or any other fruit (or veggie!) you desire.

In case you were wondering where you can find PB2, you can buy it at many national chains. I have seen it at Walmart, even. There are 2 flavors: the original peanut butter one and a chocolate one. I think the chocolate one would be amazing to make a spread like this for toast or dipping as well!


Easy BBQ Wings

Diabetic Friendly Honey BBQ Wings

The Superbowl is almost here. On February 2nd the Denver Broncos will Face off with the Seattle Seahawks for Superbowl XLVII. You are probably already thinking about what you will be munching on during the big game.

As a diabetic, all the temping treats can be hard to resist. One of the classic foods eaten at tailgate parties is wings. I don’t really care for the traditional bright orange buffalo sauce, so I go for the Honey BBQ type.

One of the trickier things about wings is, unless you buy them pre-cut into drummets, you still have to do some fabrication of the wings themselves. This can be tricky if you don’t know what you are doing. So, along with my recipe for Diabetic Honey BBQ Sauce, I am including instructions for cutting up your wings so you can get back to your game.

How to cut wings for frying:

Your wings will probably be whole and have the tips. This is usually the cheaper way to buy them and it requires a bit of skill to cut correctly.

How To Cut Up Chicken Wings 3

To cut the wings, first find the soft area between the drummet and the wing section. it will probably require you to feel around a bit and spread the wing open. Using a very sharp chef’s knife, make a cut right in the area that is softer.

How To Cut Up Chicken Wings 2

After you have the wing separated from the drummet, you must remove the wing tip. You can leave it on, but it is mostly cartilage and not much meat, so most people take it off. Again, find the soft tendon area and make a cut there.

How To cut up chiken wings 1

Make sure to remove any excess and unattached bone so it doesn’t present a choking hazard to anyone.

chicken wings

Fry your wings in oil that is pretty hot. I fry mine on medium high on the stove top in my Wok I turned into my fryer. They are done when a thermometer inserted in the thickest part of the drumstick reads 165 degrees F for 15 seconds.

chicken wings done

You can put already cooked ones in the oven to wait for the rest to be done and dry out a bit.

To make Diabetic Friendly “Honey” BBQ Sauce, you will need:

Easy BBQ Wings
 
Author:
Recipe type: Appetiser
Cuisine: American
Ingredients
  • 1 Cup of Sugar free ketchup
  • ¼ cup Splenda Brown Sugar Blend
  • 1 Tbsp Lemon or the juice from a ½ small lemon
  • ¼ cup dark Agave Syrup
  • 2 Tsp Worcestershire sauce
  • 1 Tsp dry mustard
  • Dash of pepper
  • Dash of salt
  • Dash of Cayenne pepper
Instructions
  1. Mix all ingredients together in a bowl. Heat over medium until simmering. Allow to cool if you desire. For the wings, place them in a bowl and coat them with the BBQ sauce by gently shaking them in the bowl.

chicken wings plate

I hope you have a fun Superbowl Sunday! Who are you rooting for?

Diabetic Friendly Jello Cookies

Valentine's Day Jello Cookies diabetic friendly

One of my favorite types of cookie is a soft and chewy one. I am not the type who likes to dunk my cookies in milk, so I don’t need a crunchy texture to hold up. Although I don’t have a huge sweet tooth, I like to occasionally have a treat.

These Jello Cookies are perfect for a diabetic like myself, as they contain no sugar and are sweet just the same. Make these cookies for a Valentine’s party, a sweetheart or any other event. What is also great about them, is, you can make them to fit any holiday. The ones featured are red, for Valentine’s day, of course, but you could do green Jello for the upcoming St. Patrick’s day or Orange even, for Halloween. Save this recipe for any of your holiday get-togethers.


Sugar Free Diabetic Friendly Jello Cookies


To make, you will need:

  • 1 3/4 Cups Flour
  • 1 Tsp Baking Soda
  • 1 6 Oz Package of Sugar Free Jello (Any flavor)
  • 3/4 cup Butter, Softened to room temperature but not melted
  • 1/2 Cup splenda
  • 1 Medium Egg
  • 1 Tsp Vanilla Extract


To make Sugar Free Jello Cookies:


1. Preheat oven to 400 Degrees F.

2. In a Medium sized bowl, Cream the butter and Splenda together until it is light and fluffy.

3. In a separate bowl, combine the flour and baking soda.

4. Add the egg and Vanilla Extract. Mix with the butter and Splenda.

5. Slowly and gradually, incorporate the dry ingredients, including the Jello.

6. Remove from the bowl and wrap in plastic. Place in the fridge and chill at least 30 minutes.

7. On a lightly floured surface, roll out the dough until it is about 1/4 - 1/2 inch thick, depending on personal preference. Cut out shapes with cookie cutter. Do this until dough is gone.

8. Bake cookies on an ungreased cookie sheet for 5-7 minutes. Since these do not take long to cook, make sure you keep an eye on them and not allow them to over-cook.

9. Allow to cool completely. You can frost them if you desire, but they taste just as great left unfrosted.


Valentine's Day Jello Cookies


courtneybio

How to Host a Pancake Bar Party

Diabetic Pancake Recipe

Weekends are a great time to make pancakes. I love to do a “pancake” bar at my home, especially if I have company on weekend mornings as it is a fun way to allow everyone to top their pancake exactly how they want.

Hosting a pancake bar party is very simple. You just need a few fun toppings and pancakes to do it!

How to Host a Pancake Bar Party:

First, you will need some pancakes since they are key to this type of party :) . Here is a basic pancake mix that I use since buying pre-mixed pancake batter can cost a lot and is full of sugar. I make a pancake mix that is diabetic friendly. You can make it with whole wheat flour or any kind of flour that meets your dietary needs.

  • 6 Cups flour (you can also try some almond flour, but be aware that it is high in calories, expensive and you would need to use 2 eggs instead of 1 when you mix)
  • 1 1/2 Cups powdered milk
  • 1/2 Cup Splenda
  • 1/3 Cup Baking Powder
  • A pinch of Salt
  • A pinch of Cinnamon

To make, just mix together and store in an airtight container. To make pancakes, add 2 1/2 cups mix to 1 1/14 cup water and 1 egg. You can also add 1 tbsp oil if you desire.

To set up a pancake bar, you just need toppings in small bowls. You can display them however you like. Here are some ideas for pancake toppings:

Bananas cut into slices

Peanut butter

Fresh fruit

Several kinds of syrups

Chocolate Chips

Whipped Cream

Peanuts

Whipped Butter

Candied nuts

Spices like cinnamon, allspice and cinnamon-sugar

Pie Filling such as apple pie

Chocolate syrup

Sour cream

Honey

Fruited yogurt

Pancake Bar Parties are perfect for when you have sleepovers with the kids. Children love to have choices offered to them and if one of thier choices is something like chocolate syrup, they will feel like they are being treated to something extra! I would love to hear about what you put on your pancakes. Leave me a comment with the most favorated or outrageous thing you have ever topped a pancake with!


#Diabetic Friendly Orange Cream Cupcakes

orange creme cupcakes

Diabetics often have to miss out on sweet treats because they would put them into carb overload. Of course, you can skip carbs entirely at a meal in order to enjoy a small dessert, but if the carb in the meal is too tempting, that may be a hard choice.

With summer still more than a few months away, you may be missing it as the winter drags on. Here is a treat that will remind you of your favorite summertime sweet, Orange Cream-cicles. These cupcakes are light and airy and will delight friends and family.

How to make Diabetic Friendly Orange Cream Cupcakes:

You will need:

  • A sugar free white cake mix
  • 1 can of diet orange soda
  • 1 jar of white sugar free frosting
  • 1/2 medium orange, any type
  • Orange food coloring (or red and yellow to mix)
  • Sugar free orange slice candy for garnish

To make cupcakes:

1. Preheat oven to 325 Degrees F.

2. Forget what the box mix says for the cake and just mix only the can of soda and the dry mix. Do not add any other ingredients such as eggs or oil. Since the soda is bubbly, pour it in slowly and mix with care.

orange mix

3. Bake for approximately 20 minutes in your oven. The cupcakes are done when a fork or toothpick inserted in the center comes out clean and the tops are slightly brown in color. Allow to completely cool before frosting them.

orange cupcakes done

To make the frosting:

1. Scoop the sugar-free frosting into a bowl. Take the juice of ONE HALF of an orange (make sure there are no seeds!) and add it to the frosting.

2. Mix until well incorporated.

3. Add 1 drop of red and 1 drop of yellow food coloring to the frosting and mix. If you have orange food coloring, add two drops, instead.

4. Frost your cupcakes. Slice a sugar-free orange slice candy in half and add it to the top for garnish.

orange creme cupcakes set


courtneybio

Heavenly Chocolate Banana Bread #Diabetic Friendly

heavenlychocolatebananabread


I love chocolate. However, many delicious and almost sinful chocolate foods usually are way over the top in sugar content and make my blood sugar sky rocket. The biggest issue with many diabetic desserts is they are dry and kind of bland. I am not much of a baker and this Heavenly Chocolate Banana Bread might not be 100% sugar free, it is lower in sugar content and is ultra moist, so you won’t even be able to tell it has barely in it.

I was really proud of this recipe as I am not much of a baker and most things I make turn out pretty darn terrible. This is a masterpiece, though!

To Make Heavenly Chocolate Banana Bread, you will need:

  • 1 Egg
  • 1/3 cup brown sugar
  • 1/3 cup Splenda
  • 3 tsp Vanilla extract
  • 5 VERY ripe bananas
  • 1/4 Cup milk
  • 1/2 cup butter, softened
  • 1/2 cup melted semi-sweet chocolate chips
  • A small handful of milk chocolate chips
  • 2 1/4 cup flour
  • 1/2 cup unsweetedned cocoa powder
  • Pinch of salt
  • 1 1/2 Tsp Baking powder


1. Pre-heat your oven to 350 Degrees F. Spray a loaf or brownie pan with non-stick spray. Set aside. Mash the bananas well with a hand masher for potatoes. They should almost be soupy.

2. Mix flour, salt, baking powder and cocoa powder together in a bowl. Make sure they are well mixed.

3. Stick the dark chocolate chips in the microwave and microwave in 30 second increments, stirring along the way until just melted. Don’t over-do this step. You don’t want to scorch them!

4. In a separate bowl, mix the vanilla, egg, melted chocolate, butter, milk, splenda, and brown sugar.

5. In an alternating pattern, add some bananas, then dry ingredients and then bananas and so on. Make sure the mixture is well mixed and no dry ingredients remain. It should be a thick brownie batter consistency.

6. Pour into the prepared pan and spread evenly. Take a handful of milk chocolate chips and sprinkle on top. Bake in the oven for 30-40 minutes or until a knife inserted in the middle comes out clean. Allow to cool before cutting.


signature11

# Recipe Diabetic Friendlier Mashed Potatoes

As a woman with a wee touch of Irish in me, I long for anything potato. I love mashed potatoes, especially. Since I have Type 2 diabetes, this is usually a no-go, unless I wanna torture myself with a very small portion that is more like 2 tablespoons full. I decided there had to be a way I could have some of my favorite side dish and came up with this lovely way of making mashed potatoes more diabetic friendly. Now, I can make them just as easily as I did before and they taste amazing!

diabeticmashedpotatoes

To make Diabetic Friendly Mashed Potatoes, you will need:

  • 1 Package of frozen cauliflower
  • 5-6 red potatoes
  • a 1/4 cup shredded cheese
  • 1/4 cup dried chives
  • 2 teaspoons salt
  • 1/2 tsp pepper
  • 1/4 cup milk
  • dash of garlic powder
  • dash of onion powder


1. Start by quartering the red potatoes. I leave the skin on for texture as well as nutrients. Rinse them and place in a pot to boil for 15 minutes.

2. Place the contents of one bag of frozen cauliflower in a separate pot of boiling water. Allow to boil until potatoes are done and they are mushy in texture.

3. When potatoes are soft and cauliflower is ready, drain.

4. Here comes the fun part! Using a hand masher (I use a smood), mash the potatoes and cauliflower together.

5. Add milk and cheese and continue to mash until a nice paste forms.

6. Add in seasonings and dried chives. Serve!


This is a more diabetic friendly way to eat this dish because cauliflower is being supplemented for half of the potatoes in a normal recipe and since it is low on the glycemic index, it will mean you can have an extra helping, if you like.

You can top with gravy, but I just eat them plain as I do with most mashed potatoes. I think this would make an excellent dish to add to your holiday or any-day dinners!


signature11

Bubble Pizza

bubblepizza


If your family loves pizza, but you’re on a budget and can’t order take out every week, then you’ll love this pizza recipe. My family really loves pizza, but since we’re on a budget I have an ongoing list of homemade pizza ideas to keep them happy. This particular recipe is one of my most frugal. The ingredients are super simple and inexpensive. You can be as creative as you want and add just about any toppings your family likes to it. It is just the basic concept that you should appreciate and then customize it to fit your family.

You may have heard of a bubble pizza before, but if not imagine if you will the crust, only instead of being flat it bubbles up because it is made from canned biscuits all pieced together. You can make it as big or small as you want and can even make personal sized pizzas to let your kids choose their toppings.

Bubble Pizza Recipe

Ingredients:

canned biscuits

jar of pizza sauce

mozzarella cheese – You can use other cheeses if you wish.

toppings of your choice – My family enjoys pepperoni, bacon, mushrooms, spinach and chicken.

Directions:

Open the canned biscuits and flatten them with your hands into a pizza crust shape onto your pizza pan. As I said before, you can make the crusts any size you want. Use three biscuits to form personal sized pizzas or use the whole can or several cans to form a larger pizza crust. After the crust is formed you basically add the sauce, cheese and toppings like you would with any other pizza. Finally, bake in the oven at 350 degrees until crust is brown and cheese is melted and bubbly.

The most unique thing about this pizza is its crust and the fact that it is inexpensive. You can get as creative as you want with it or stay as simple as you wish.


Alyssa is a Christian mom blogger and published author who loves helping moms with WAHM tips, frugal recipes, budgeting, and parenting. She, her husband (Greg) of 13 years and her three precious children call the Deep South home.

Homemade Taco Seasoning Recipe

My family eats tacos like they are going out of style. What gets expensive (although it is not usually too bad if you can find it on sale) is the taco seasoning. To solve this problem, I started making my own and came up with this easy homemade taco seasoning recipe. It is really very simple and the great thing about making things like this yourself, is, you can adjust to your personal tastes!

tacos

For this Taco Seasoning Recipe, you will need:

  • 1/2 Cup Chilli Powder
  • 3 1/2 Tbsp ground cumin
  • 3 1/2 Tbsp Garlic salt (use Garlic Powder if you are watching sodium intake)
  • 3 Tbsp Chipotle Powder
  • 2 tbsp ground oregano
  • 1 tbsp Cayenne (cut in half or omit depending on spiciness factor you are trying to achieve)

To Make:

It is very simple. Just combine ingredients. To use, just add 2 1/2 Tbsp per lb of ground meat or chicken with 1/4 cup of water. Stir it and evenly distribute the taco seasoning mix and let water evaporate. I also suggest drining meat of grease before adding. This also goes well in taco casseroles and really give burgers a kick if you mix it into the ground meat and them make patties!


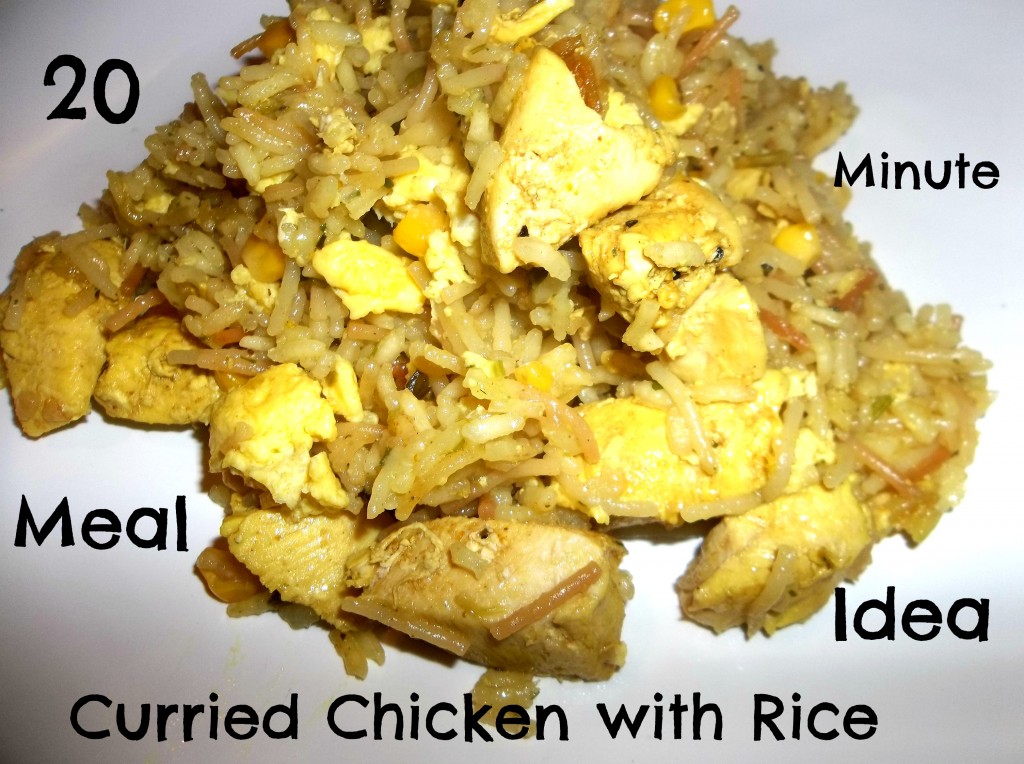
20 Minute Meal Idea: Curried Chicken and Rice

As a busy mom and wife, I am always on the hunt for meals I can just throw together when I am exhausted from work. Often times, as I hate to admit, if I am too tired, it becomes a “pizza night”. I feel guilt about this as I would love to make home cooked meals for my family instead of take the lazy way out and do take out.

Since I have gone through culinary training, I feel terrible about using a lot of boxed meals. I can never just leave things alone as they are. I always have to enhance them with my own ingredients.

Ever since I was a child, I have loved Rice-a-Roni. I was tired one night and we needed to go to the grocery store and I had very little to work with. The last thing I want to do when I am exhuasted is head to the grocery store, even though it is just a couple blocks away. I had to use what I had!

I decided to make this easy concoction and I hope you will use it when you need a quick meal that is filling and delicious!

curriedchick

To make Curried Chicken with Rice, you will need:

  • 1 1/2 Pounds boneless, skinless chicken breasts or about 3 medium sized breasts
  • 2 Boxes of friend rice flavor Rice-a-Roni
  • 1 Cup canned corn
  • 4 Tablespoons margarine or butter
  • 5 3/4 Cups water
  • 2 medium eggs
  • 1 1/2 Tablespoons Curry
  • A pinch of white pepper
  • A pinch of black pepper
  • Salt to taste

1. Start by making the Rice-A-Roni according to directions (with 5 cups water and 4 tablespoons margarine).

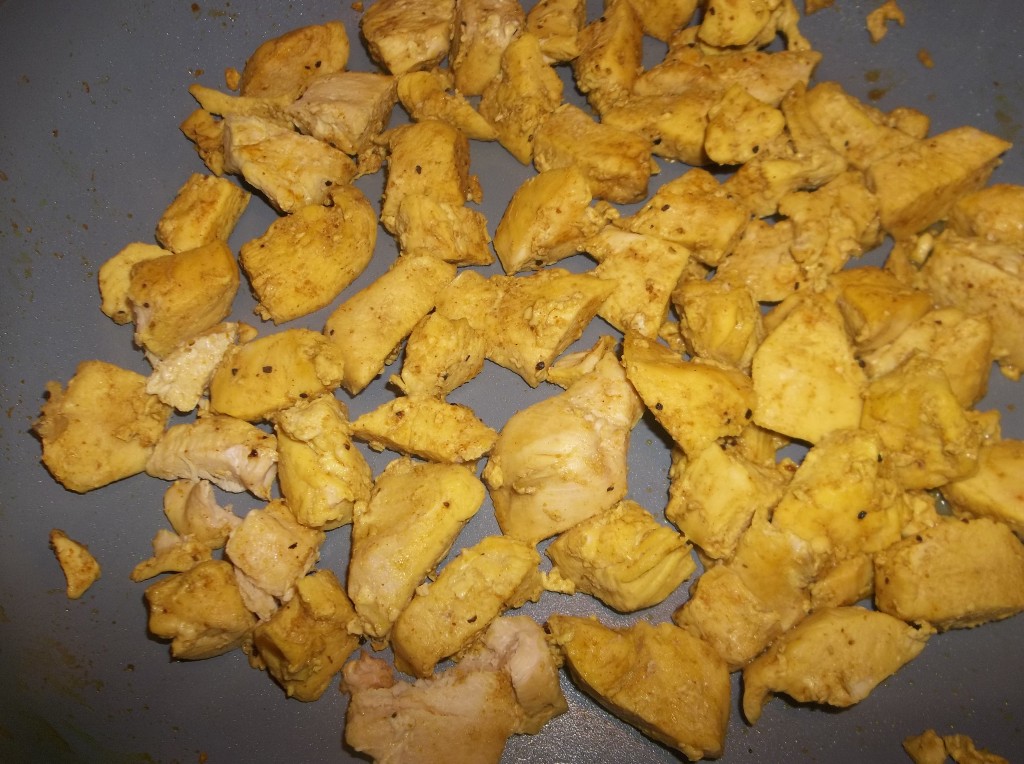
2. Cut chicken into cubes and saute in a pan over medium heat. When it is almost done, add 3/4 cup water, adjust heat to medium high and add curry and a pinch of black pepper. Cook until water is absorbed.

100_3871

3. When Rice-A-Roni is almost done, add corn to it and stir in.

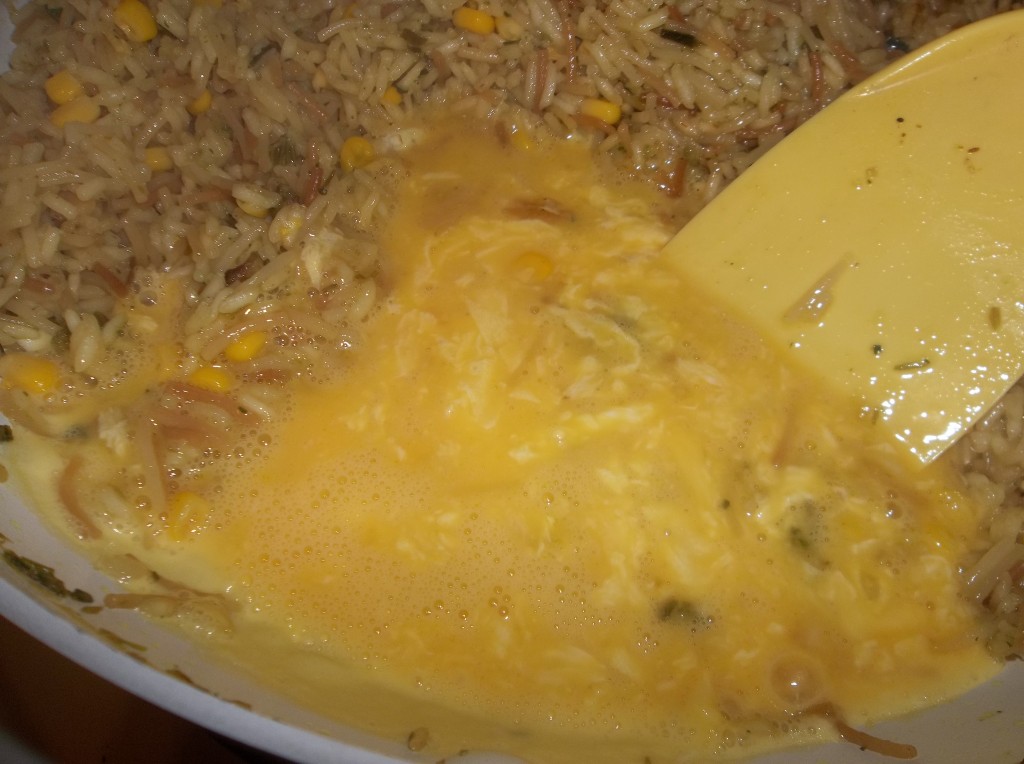
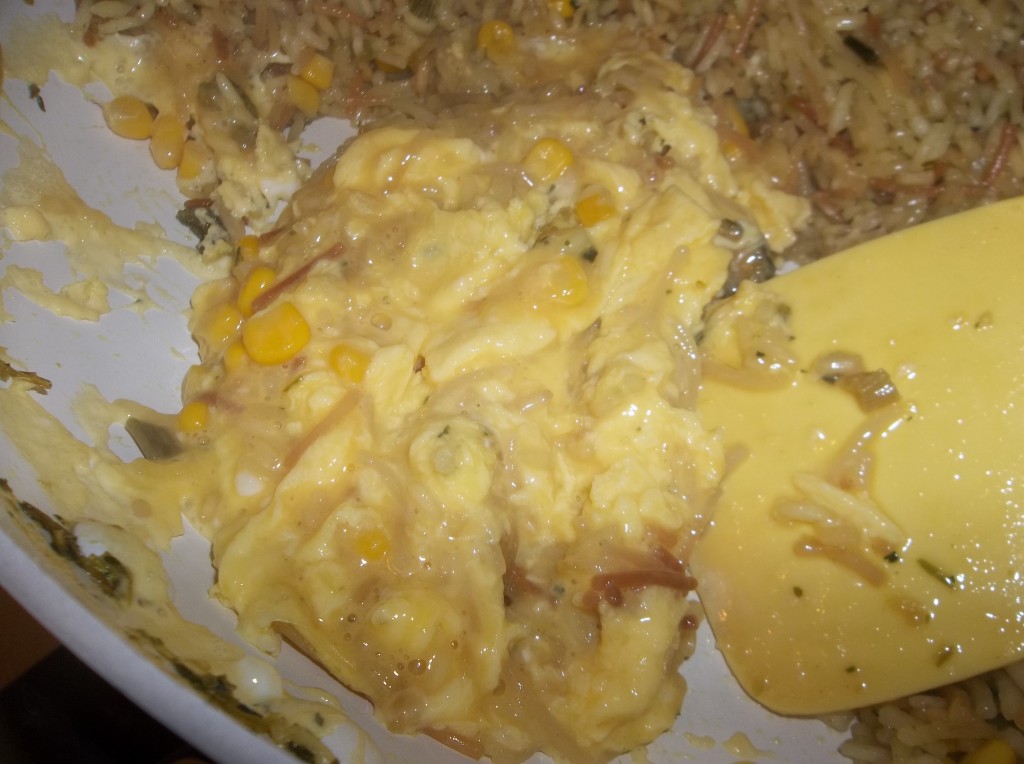
4. Beat eggs and make a space in your skillet for them. Pour the eggs into this space and gently scramble over medium heat. When almost all the way scrambled, mix into rice.

100_3872

100_3873

4. Add Chicken to pan with rice in it. Sprinkle a pinch of white pepper on top and mix in well. Add a bit of salt to taste.

100_3879

That’s it! This whole process from start to finish took me less than 20 minutes! My family raved about it. If you don’t like corn, try peas. They taste excellent in this as well!